HOME

Tuesday, February 26, 2013

PROOFING; for Trade Show & Exhibit Graphics


TRADE SHOW & EXHIBIT GRAPHICS
What You Need to Know ~


ICL Imaging Color Matching
PROOFING:
You should always ask your PSP (Print Service Provider) to provide you with a proof before the final graphics are produced. 

Allow anywhere from 24 to 48 hours in most cases for your proof to be ready.  Then allow sufficient time to review the proof with your boss, client or whomever.  The PSP’s production clock stops at this point until you approve the proof - which means the longer you take to approve it, the longer your due date becomes.

Prior to the proofing process give the printer any Pantone Matching Colors, products or art work that is critical for color-match.
ICL Imaging Proofing

If possible always build in enough time for a second round of proofing just in case you are not satisfied with the results of the first proof, usually another 24 hours.  Once the approval is ok’d the printing process will begin.


ICL Imaging - Framingham, MA

info@icl-imaging.com  or  (508) 872 - 3280


FINISHING OPTIONS; for Trade Show & Exhibit Graphics


TRADE SHOW & EXHIBIT GRAPHICS
Measure Twice - Cut Once
What You Need to Know ~

FINISHING OPTIONS:
Once your Trade Show & Exhibit Graphics have been printed they will most likely need some type of finishing. 

Your PSP (Print Service Provider) can recommend various finishing options, the most common being mounting and laminating.

The most common substrate used for mounting prints is a foam-board like Gatorfoam, Ultraboard or Foamcore.  These come in black and white and different thicknesses.  4’x8’ size is the standard board size but larger sizes can be specially ordered.

Another very popular material is PVC, such as Komatex or Sintra.  Again these come in different sizes and thicknesses and colors.  It is more durable than foamboards but also heavier.

Clear plexi-glass can be used for second surface mounting for backlit transparencies or for mounting a print underneath the surface.  These are typically used on lobby walls with metal stand-offs.

Mounting & Laminating at ICL
As for laminates, a luster laminate with a UV inhibitor is the most common type of over-lam offering some protection to the print.  It is mainly used when the print will be mounted on top of a substrate.  Laminates also come in matte and glossy as well as textures and different thicknesses.  Laminates will help protect the graphic to some extent and the UV inhibitors built into the film will retard fading.

Thicker lamination is required like; Lustex, available in 5, 10 and 15ml thicknesses for roll-able panels.  Roll-able trade show graphic panels typically will have magnetic tape or Velcro applied to the edges.  Hangers and kickers can also be added for use on portable Pop-Up exhibits enabling the exhibitor to hang the graphics onto the hardware.

ICL Imaging Stitcher
Finishing for fabric banners involves stitching pole pockets to allow a pipe or rod to be installed for hanging.  Hemming can be added for a finished look or to help reinforce the edges of the fabric.  Fabric can also have Velcro attached to it or silicone edging (S.E.G.) for extrusion based display systems.

Other finishing services can include Silhouette cutting to create life-size cut outs and other interesting shapes other than squares or rectangles.  Some substrates can also be heat bent to obtain different shapes.


ICL Imaging - Framingham, MA

info@icl-imaging.com  or  (508) 872 - 3280


PRINTING OPTIONS; for Trade Show & Exhibit Graphics


TRADE SHOW & EXHIBIT GRAPHICS
HP Designjet L25500 Printer at ICL Imaging
What You Need to Know ~

PRNTING OPTIONS:
The first thing to consider when thinking about your Trade Show & Exhibit Graphics, is what type of material would you like; rigid substrates, flexible roll-able graphics, or soft goods such as fabric.  A lot of this will depend on the type of exhibit hardware you will be using.

Your PSP (Print Service Provider) will ask you questions about the size, application, and your budget in order to best determine the right material(s) for you and what will yield the best results for what you are looking for.

Other factors that may influence the material selections are Pantone Matching Colors specified (not all materials print the same), apparent resolution desired, texture wanted, reflectance concerns, and longevity of the graphic and the output devices available to the PSP.

A PSP with a wide variety of in-house output devices will be able to offer you more choices and hence provide you with the best solution for your application.

Once the materials have been chosen this will dictate which output device will be used for printing.  The output device controls the resolution and process type ie; Photo, Dye-Sublimation, Solvent, UV Curable, UV Pigment, Latex, and Aqueous Ink. 

Output devices are limited to the maximum print width they can handle as well as printable material choices they can accommodate (materials can be printed only on certain machines).

Trade Show Graphics can be printed directly to substrates (DTS) on clear, translucent and opaque materials or can be Dye-Sublimated onto a wide variety of fabrics or printed as continuous tone images photographically, as well as imaged onto banner vinyl, Paper, Film, Adhesives, and more.

Find a PSP who offers a full range of these materials and output devices in-house. Printing widths can go up to 16 feet wide creating enormous trade show and event backdrops.


ICL Imaging - Framingham, MA

info@icl-imaging.com  or  (508) 872 - 3280


LEAD TIMES; for Trade Show & Exhibit Graphics


TRADE SHOW & EXHIBIT GRAPHICS
What You'll Need to Know ~
Akamai Trade Show Graphics


LEAD TIMES:
Depending on the complexity, size and quantity of your Trade Show & Exhibit Graphics, will depend on the lead-time needed to produce them.

Lead times are based on when the PSP (Print Service Provider) receives your print ready file.  Shorter than normal lead times may limit your graphic options and increase your costs – so plan accordingly.

Contact your PSP and review your graphics order with them. They will tell you how many days are needed to complete your project. Once they receive your print file(s), the graphic production lead-time schedule will begin.

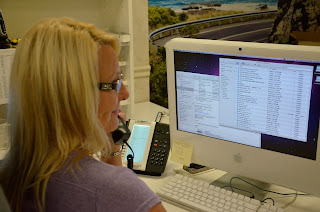
CSR at ICL Imaging Pre-Flighting
A good PSP will pre-flight your files as soon as they arrive and compare it to the information on the trade show graphic order. Beware; print files typically come in with missing fonts, missing attachments, images that are too low in resolution to print from or the proportions of the image don’t proportion out to the sizes of the graphics required.  Changes and revisions from companies happen all the time too.  This could affect your due date.  Build in extra lead-time whenever possible to deal with these unknown, but all to frequent issues that can arise during the pre-flighting and production process.

Once your print file goes into production, allow 24 to 48 hours for proofing.  Once you have approved the proof for printing, allow another 24 to 48 hours for the unfinished finals.  Finishing services such as; mounting, laminating, silo-cutting, etc, generally require another 24 hours, again depending on the complexity, size and quantity of your trade show graphic order.


Wooden Crate for Shipping
When your trade show graphics are finished, they will be carefully packaged and shipped per your instructions to your specified location.  Allow sufficient time for standard shipping in order to keep costs down vs. priority overnight which could cost you hundreds of dollars more - especially if the graphics are rigid, oversized and need a heavy wooden crate for protection.


Get a Quick Fed X Quote

Lead times for most trade show & event graphics will take 4 to 5 days for completion.  The wildcard is always the pre-flighting and proofing process – will it pass or fail?


ICL Imaging - Framingham, MA

info@icl-imaging.com  or  (508) 872 - 3280


PRE-EVENT PLANNING; for Trade Show & Exhibit Graphics


Setting Up Graphics on a POP-UP Frame
TRADE SHOW 
& EXHIBIT GRAPHICS
What You'll Need to Know ~


PRE-EVENT PLANNING:
Prepare a schedule of all the due dates needed to have a successful Trade Show. Determine the show opening date and work backwards creating a list of deadlines for your different items. What’s the set-up date and when is the deadline for advanced receiving?

For your Trade Show & Exhibit Graphics, you should also know what the rules are for displaying graphics, banners and other signage. This will put limits your on graphic sizes.

Large Wooden Crate for Trade Show Graphics

Do you have an existing trade show booth or are you going to be purchasing or renting one – you’ll need to know the size of the exhibit hardware and what are the graphic panel sizes and how do they attach – by hangars, magnetic tape or Velcro?


If your graphics are flexible and roll-able – the shipping container can be lighter and smaller than if they are rigid substrates - which may require a larger crate for shipping.

Will you need to hire a graphic designer to create your graphics or are you using an existing print file.  The designer will have to know the graphic sizes and when you’ll need the file.  Get the production lead-time from your PSP (Print Service Provider) and always build in another day of 2. Now check, does this allow you enough lead time to meet your deadline?

ICL Imaging - Framingham, MA

info@icl-imaging.com  or  (508) 872 - 3280


Trade Show & Exhibit Graphics


TRADE SHOW & EXHIBIT GRAPHICS
What You'll Need to Know ~


No one knows trade show and exhibitions better than ICL Imaging.  We’ve been printing trade show graphics for over 50 years, for clients of every size.
ICL can print, mount and laminate your trade show graphics onto a wide variety of materials, some up to 16 seamless feet wide and ship it on time, on budget and on target with any audience.
Our selection of premium banner stands will also complement your trade show and exhibit graphics too, whether printed on fabric, vinyl or paper.

REFERENCES:

Trade Show Exhibitors Associaton
http://www.tsea.org/  

The International Center for Exhibitor and Event Marketing

"Five Steps to Successful Signage" by Lena Valenty


ICL Imaging - Framingham, MA

info@icl-imaging.com  or  (508) 872 - 3280


Tuesday, February 5, 2013

WALL MURALS by ICL Imaging

WALL MURALS
5 Things to Consider when Producing a Wall Mural.

Wallpaper by ICL Imaging
It comes down to 2 choices; Wallpaper or Adhesive Vinyl, but which one?  

1. Removability
How long do you plan on having the wallcovering up?  Short Term less than a year or two, or longer term up to 5 years or more.
Wallpaper can be removed fairly easily if the walls have been properly primed prior to the installation.
After the wallpaper is removed the walls can be lightly washed with soap and water to easily clean any residual adhesive remaining.
Vinyl adhesive; Depending on the type, permanent or removable, it will depend on how easy it is or not to remove.  Long term, the permanent Vinyl Adhesive, will stick better and of course will be harder to remove.  For short term applications, a removable vinyl adhesive is the way to go.
FABJET II from Quality Media and Laminating is an adhesive backed fabric that is ultra removable, excellent opacity and has a waterfast coating suitable for cleaning.  Negative concern is it is ultra removable making it not a good choice for public areas.

2. Wall Surface
The surface texture of a wall can make can or break the success of an installation.  Rough textures do not hold the adhesives well.
Glossy painted walls are difficult to adhere to. Vinyl adhesives won't adhere very well to matte wall surfaces.  
Eggshell paint is a terrible surface to bond to except for the FABJET II!
Wall surfaces should be both clean and smooth
For Wallpaper, use a Shieldz brand primer product such as Clear for solid painted walls and White for new walls
For Adhesive Vinyl, it's best to use a latex semi-gloss paint and allow to dry and cure for at least 2 weeks.

3. Finished Look of Wall Mural
Adhesive Vinyl for Tufts
Vinyl adhesive material requires overlapping seams due to the natural shrinkage of the material that will occur early on after installation. These small seams, depending on your image, can be noticeable. A vinyl material for long term will need an overlam applied to it.  Surface choices can be matte, lustre or gloss.
Wall-paper material can be overlapped then double cut creating very tight seams with no overlap showing. Wallpaper materials come in a variety of surface textures however colors can appear a little flatter / less saturated than on adhesive vinyl

4.  Wall Variations 
Windows and door frames can cause installation problems if the correct material is not used.  If you want to cover your walls, door and window casings with a wall graphic, wallpaper is probably not going to work for you.  Vinyl adhesive will conform better to the corners and angles of the casings and will adhere better with its' more aggressive adhesive.

Nature Conservancy Wallpaper

5. Installation
The Wall; Before the installation takes place the walls should be spackled and sanded wherever necessary and then wiped clean. 
Wallpaper; Before hanging, the wall has to be primed with a white primer. Priming promotes adhesion. Kilz brand primers have show excellent results and reduce staining and bleed through problems.  Allow at least 5 full days of drying before applying graphics. Do not use latex W as the wallpaper paste can soften the latex making the paper become part of the wall.
Adhesive Vinyl; It's best to use a latex semi-gloss paint and allow to dry and cure for at least 2 weeks to eliminate the outgassing that would create bubbles under the wall mural material.


So what material should I use?  ICL Imaging's sales reps will be glad to answer that question for you - just shoot us an email, info@icl-imaging.com, and we'll be glad to review your wallcovering project and offer you the best product solution.

Adhesive Vinyl for Maine State Lottery
For more information about ICL Imaging, its' products and services, please contact us at
Tel: 508 872 3280
or check us out at